I was, I am, I will be – Badges to tell a story of YOU
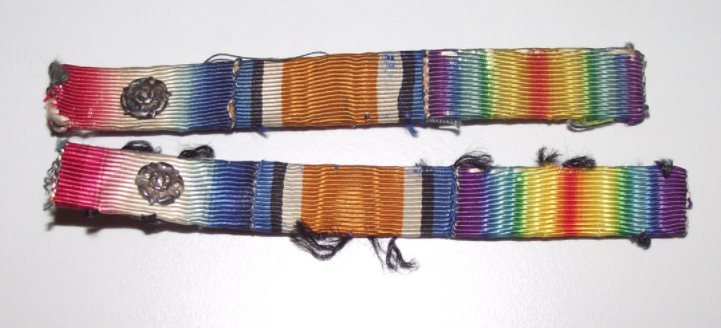
Badges, pins, ribbons and medallions tell a story about the person wearing them.
There are many in the National Maritime Museum’s collection. Some are awards, others are used for identification.
They all use bright colours, symbols and shapes to tell a story.


Today, many people wear badges for to share lots of different information.
What would you like other people to know about you?
Warm-up activity: Past – Present – Future Brainstorm
You will need:
- 1 sheet of paper; could be in a sketchbook or diary
- pencils and/or pens
- a clock, watch or timer

- Draw lines to divide your paper into three columns. Write “Past”, “Present”, “Future” at the top of the columns
2. Think about each of these words.
What would you want someone to know about your past, present, and future? What are you most proud of? Is there anything you want to share? What do you want to do, or be?
What makes you, you?

3. Set your timer for 2 minutes, and go!
Scribble, draw, write, doodle for 2 minutes each for your Past, Present, and Future
Use your brainstorm to help you make your badges.

I was, I am, I will be – Badges to tell a story of YOU
To make your badges, you will need:
- Paper – colour paper, recycled, junkmail, scrap!
- Card – from a package, box, or even a loo roll
- A safety pin or an old badge you do not wear anymore
- Tape
- Scissors
- Pencils or pens
- Glue (optional)
- Decorations such as beads, rice, macaroni (optional)
- Fabric ribbons (optional)

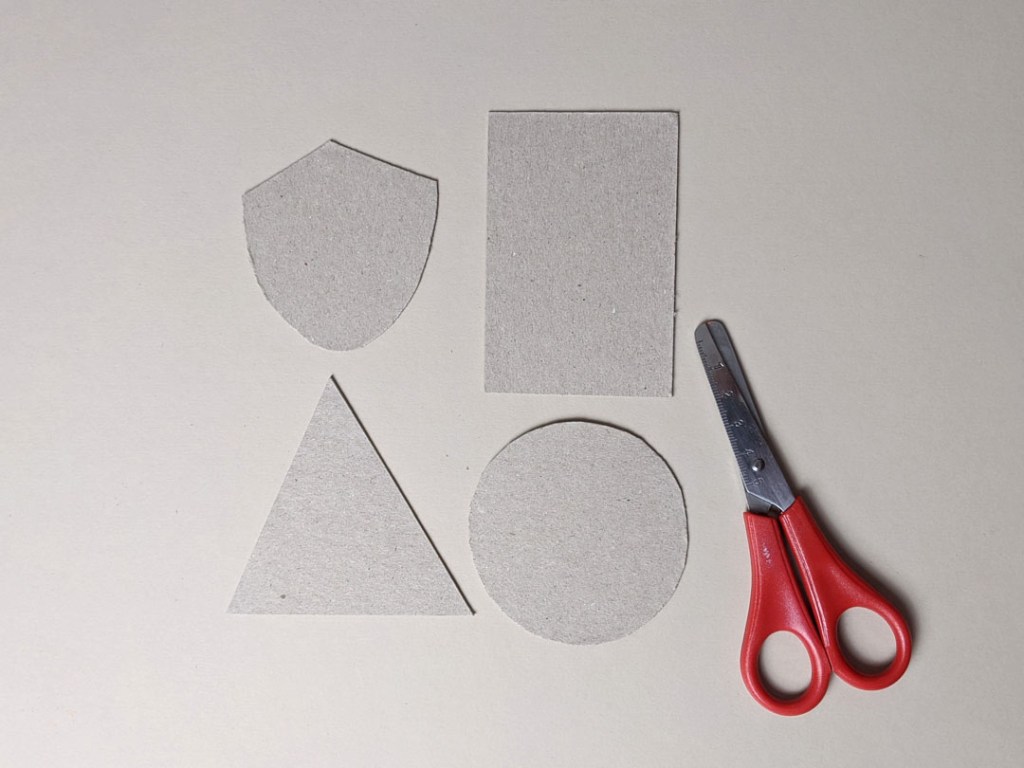
- Cut your card into a base shape.
This could be a circle, rectangle, shield shape, heart, star, whatever you like!

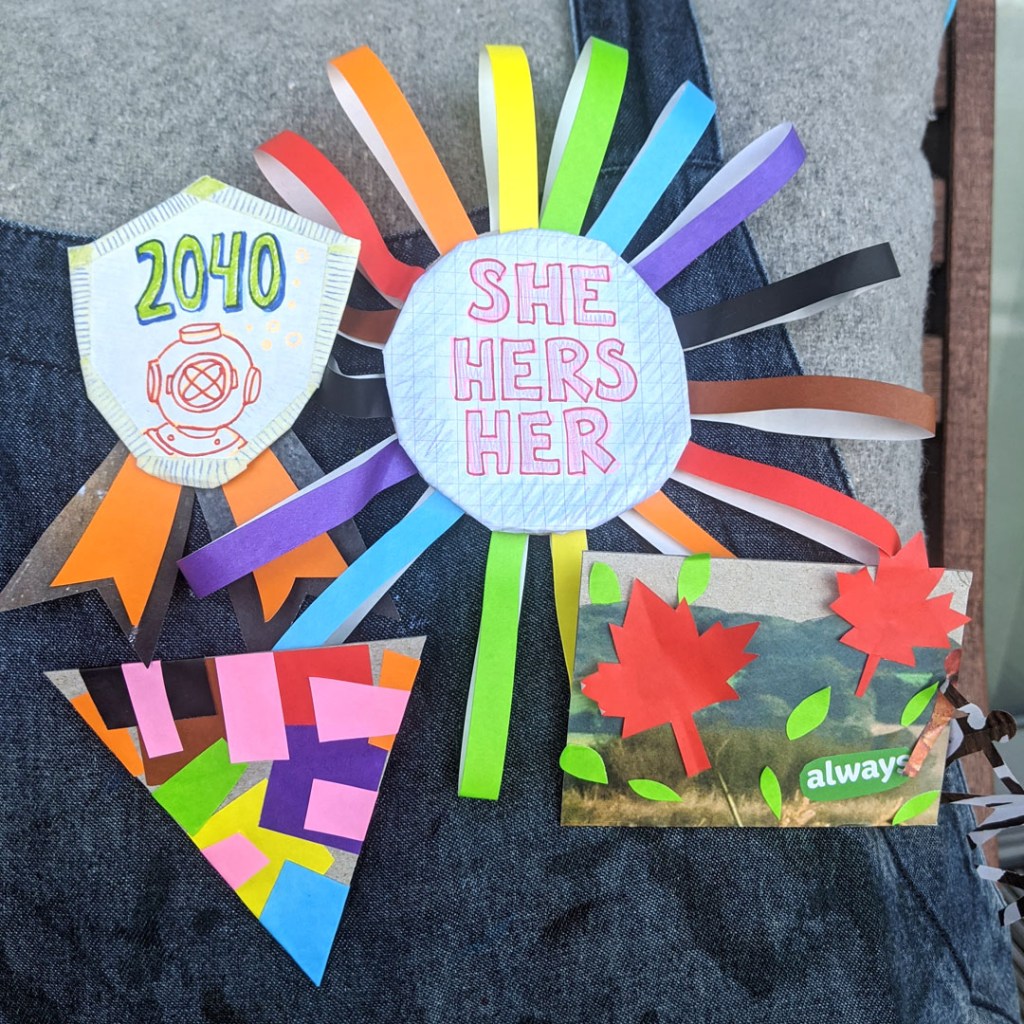
2. Design your badge.
Use papers, pens, pencils, tape and glue, and any other materials you may have.
What symbols, words, and pictures can you use to describe yourself, past, present and future? You can mix and match writing, drawing, cutting and pasting.
If you have old magazines or newspapers, you can cut out pictures to add to your badges.
Here are some examples:
Top tip: Go outside of the base shape and add ribbons and other decorations
3. Flip your badge over, and tape a safety pin to the back of the card. Ask a grown up to help with this part.
Use a piece of masking tape to secure the pin to the back. Add tape to make it stronger.
4. Wear your badges with pride.
5. Make more badges!
Use materials you have at home to tell a story about yourself. Share your creations with us!
Bonus: Here are the steps to making the “rosette” badge
Additional resources in support of LGBT+ History Month:
- Stonewall – Acceptance without exception
- MindOut – Lesbian, Gay, Bisexual, Trans & Queer Mental Health Service
- Just Like Us – Charity for LGBT+ young people
- Mosaic Trust – LGBT+ Young Persons’ Trust
- OutRight Action International – Flags of the LGBT+ community
